
Setting up Microsoft 365 synchronisation
Import your users and groups to SiberMate automatically with Microsoft 365 synchronization.
Setting up Microsoft 365 synchronization allows you to easily import your users and groups to SiberMate directly from your Microsoft 365 directory, and to keep your users and groups automatically up to date on the SiberMate app.
To set up M365 synchronization, you will need to:
How to authenticate your M365 account in SiberMate
To start setting up your Microsoft 365 synchronization, head to the Microsoft 365 Settings page inside your SiberMate app.
If you haven't run through the Microsoft 365 SiberMate setup process before, you will be prompted to start the setup on the Microsoft 365 settings page.
You will need to have the right privileges within M365 to authorize synchronization.
Click the Sign in with Microsoft button to start the setup process.

You will be prompted to select between Application Permissions or Delegated Permissions authentication.

Application Permissions allows the sync to run as a background service without the need for a delegated user. Delegated Permissions relies on a delegated user i.e. the MS account used to authorize the sync. We recommend Applications Permissions as it is more reliable and is Microsoft's intended solution for integrations like this.
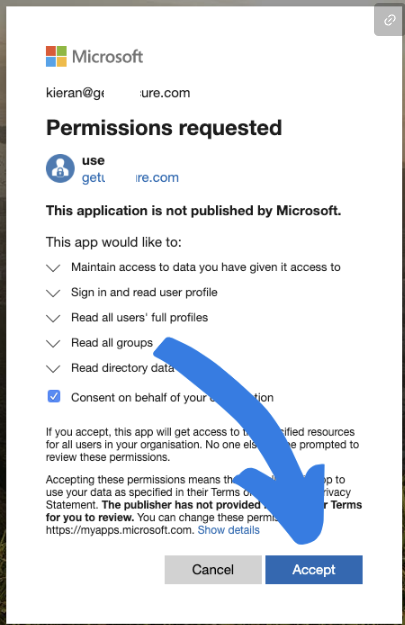
You will then be prompted to sign in to your Microsoft account and allow SiberMate to access user and group data using the authentication type you selected.
Click Accept.
How to set up automatic AD synchronization
Step One - Starting The Setup Wizard
The SiberMate Microsoft 365 synchronization setup wizard will now start. You will see an introduction page to let you know which options you will be able to configure.
Click Start on the bottom right to proceed.

Step Two - Automatic sync options
On the second page of the setup wizard, you will be able to choose whether you want the Microsoft 365 sync to run automatically. If you choose the sync to not run automatically, you will need to perform manual synchronizations to import users and groups from Microsoft 365 into SiberMate.

Once you have chosen whether you want syncs to run automatically, click Next on the bottom right to proceed.
Step Three - Choose your User Email Method
In the third step you will be able to choose how the Microsoft 365 sync establishes a user's email address from their AD data.

"User Principal Name Only" is the default method and should work well for most M365 tenants. We would recommend using this approach on your initial setup.
Step Four - Choose whether to include groups
On the fourth page you will be able to choose whether you want to include groups in your Microsoft 365 syncs. If you choose not to include groups, only users will be imported without any group data.

Step Five - Choose whether to select groups manually
You will now be able to choose whether to only import users from certain groups in your Microsoft 365 directory. If you select No, users from all groups will be synced.

Step Six - Choose whether to map groups
You may already have a group structure in the SiberMate app that doesn't mirror your group structure in Microsoft 365. If so, you can use this step to begin group mapping, which will allow you to map groups from M365 into your existing group configuration on the SiberMate app.

Step Seven - Choose which types of groups to import
Microsoft 365 supports two types of groups: Microsoft 365 and Security. In this step, you can choose whether to import one or both types of groups from your directory.

Note: For dynamic groups, you will need to select All and your dynamic groups will be available to select in the next step.
Step Eight - Configure your groups
In this step you will be able to choose which groups to include in syncs. If you chose to enable group mapping, you will also see an option to map groups from Microsoft 365 into existing groups in your SiberMate app.

Step Nine - Exclude Unlicensed Users
You can exclude unlicensed users from the sync during this step. This can be useful for excluding shared mailbox users if they lack any product licenses.

Step Ten - Choose whether to import managers
You can choose whether you want to import assigned managers for each user into SiberMate. These will show on the Users page as Direct Managers.

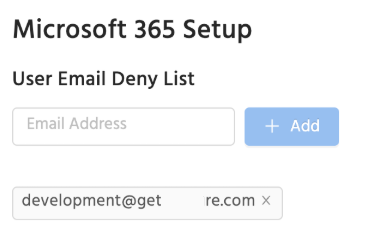
Step Eleven - Configure your user email deny list
You may have users in your Microsoft 365 directory who you wish not to import to the SiberMate app. You can add their email addresses to this email deny list to ensure that they won't be included in any future syncs.
Step Twelve - Test your synchronization
The setup wizard will now prompt you to test your Microsoft 365 synchronization. This test sync will show you what data a synchronization will find and synchronize without importing any data to the SiberMate app yet. The Test Sync emails the results of the sync to the address you've signed in with.

Step Thirteen - Complete your Microsoft 365 setup
Your Microsoft 365 synchronization setup is now complete. If you enabled automatic synchronization your chosen users and groups will automatically be imported to the SiberMate app within the next 24 hours. If you chose to not enable automatic synchronization, you will need to run a Manual Sync to import your users and groups.
Next steps